How to Build A Custom Linux Kernel For Qemu
Preparation
WORK_DIR=$HOME/Qemu/test-busybox
cd $WORK_DIR
Download Busybox source code.
wget https://busybox.net/downloads/busybox-1.27.2.tar.bz2
tar -xvf busybox-1.27.2.tar.bz2
Git clone the master branch of linux kernel.
git clone git://git.kernel.org/pub/scm/linux/kernel/git/torvalds/linux.git
Busybox Userland
The first thing we’ll do is create a minimal userland based on the ever-useful busybox tool. After building busybox, we’ll throw it in a minimal filesystem hierarchy and package it up in an initramfs using cpio.
Let’s go configure busybox now:
$ cd $WORK_DIR/busybox-1.27.2/
$ mkdir -pv ../obj/busybox-x86
$ make O=../obj/busybox-x86 defconfig
Note: in the busybox build system, O= means “place build output here”. This allows you to host multiple different configurations out of the same source tree. The Linux kernel follows a similar convention.
This gives us a basic starting point. We’re going to take the easy way out here and just statically link busybox in order to avoid fiddling with shared libraries. We’ll need to use busybox’s menuconfig interface to enable static linking:
$ make O=../obj/busybox-x86 menuconfig
type /, search for “static”. You’ll see that the option is located at:
-> Busybox Settings
  -> Build Options
[ ] Build BusyBox as a static binary (no shared libs)
Go to that location, select it, save, and exit.
Now build busybox:
$ cd ../obj/busybox-x86
$ make -j2
$ make install
So far so good. With a statically-linked busybox in hand we can build the directory structure for our initramfs:
$ mkdir -pv $WORK_DIR/initramfs/x86-busybox
$ cd $WORK_DIR/initramfs/x86-busybox
$ mkdir -pv {bin,sbin,etc,proc,sys,usr/{bin,sbin}}
$ cp -av $WORK_DIR/obj/busybox-x86/_install/* .
Of course, there’s a lot missing from this skeleton hierarachy that will cause a lot of applications to break (no /etc/passwd, for example), but it’s enough to boot to a shell, so we’ll live with it for the sake of brevity. If you want to flesh it out more you can refer to these sections of Linux From Scratch.
One absolutely critical piece of our userland that’s still missing is an init program. We’ll just write a tiny shell script and use it as our init:
$ vim init
The content of init is as follows:
#!/bin/sh

mount -t proc none /proc
mount -t sysfs none /sys

echo -e "\nBoot took $(cut -d' ' -f1 /proc/uptime) seconds\n"

exec /bin/sh
$ chmod +x init
The Gentoo wiki’s Custom Initramfs Page is a great reference for building a minimalistic initramfs if you’d like to learn more.
We’re now ready to cpio everything up:
$ find . -print0 \
    | cpio --null -ov --format=newc \
    | gzip -9 > $WORK_DIR/obj/initramfs-busybox-x86.cpio.gz
We now have a minimal userland in $TOP/obj/initramfs-busybox-x86.cpio.gz that we can pass to qemu as an initrd (using the -initrd option). But before we can do that we need a kernel…
Linux Kernel
Refer to Debian8/LinuxMint17 编译 Linux Kernel 4.0 and Fedora21 编译 Linux Kernel 4.0 when you build linux kernel.
Remember to add O=../obj/linux-x86-basic when you build linux kernel like building busybox.
Booting Qemu
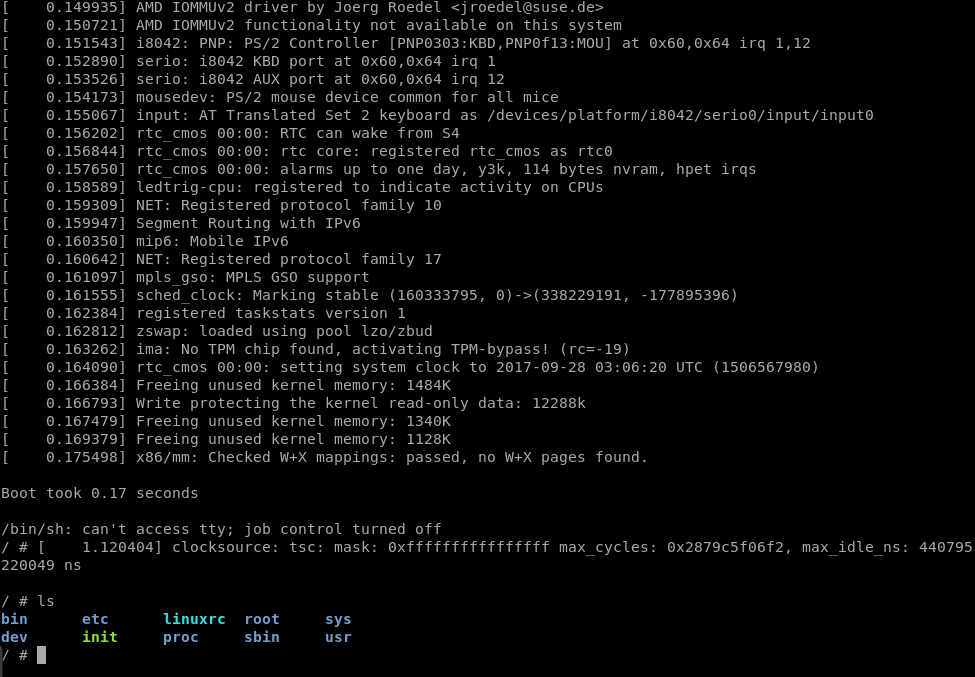
Now that we have a kernel and a userland, we’re ready to boot! You can use qemu-system-x86_64 to try out your new system:
$ cd $WORK_DIR
$ qemu-system-x86_64 \
    -kernel obj/linux-x86-basic/arch/x86_64/boot/bzImage \
    -initrd obj/initramfs-busybox-x86.cpio.gz \
    -nographic -append "console=ttyS0"
Exit the VM by hitting Ctrl-a + c then typing “quit” at the qemu monitor shell.
If your host processor and kernel have virtualization extensions you can add the -enable-kvm flag to really speed things up:
$ qemu-system-x86_64 \
    -kernel obj/linux-x86-basic/arch/x86_64/boot/bzImage \
    -initrd obj/initramfs-busybox-x86.cpio.gz \
    -nographic -append "console=ttyS0" -enable-kvm
References
How to Build A Custom Linux Kernel For Qemu (2015 Edition)
How to debug the Linux kernel with GDB and QEMU?